
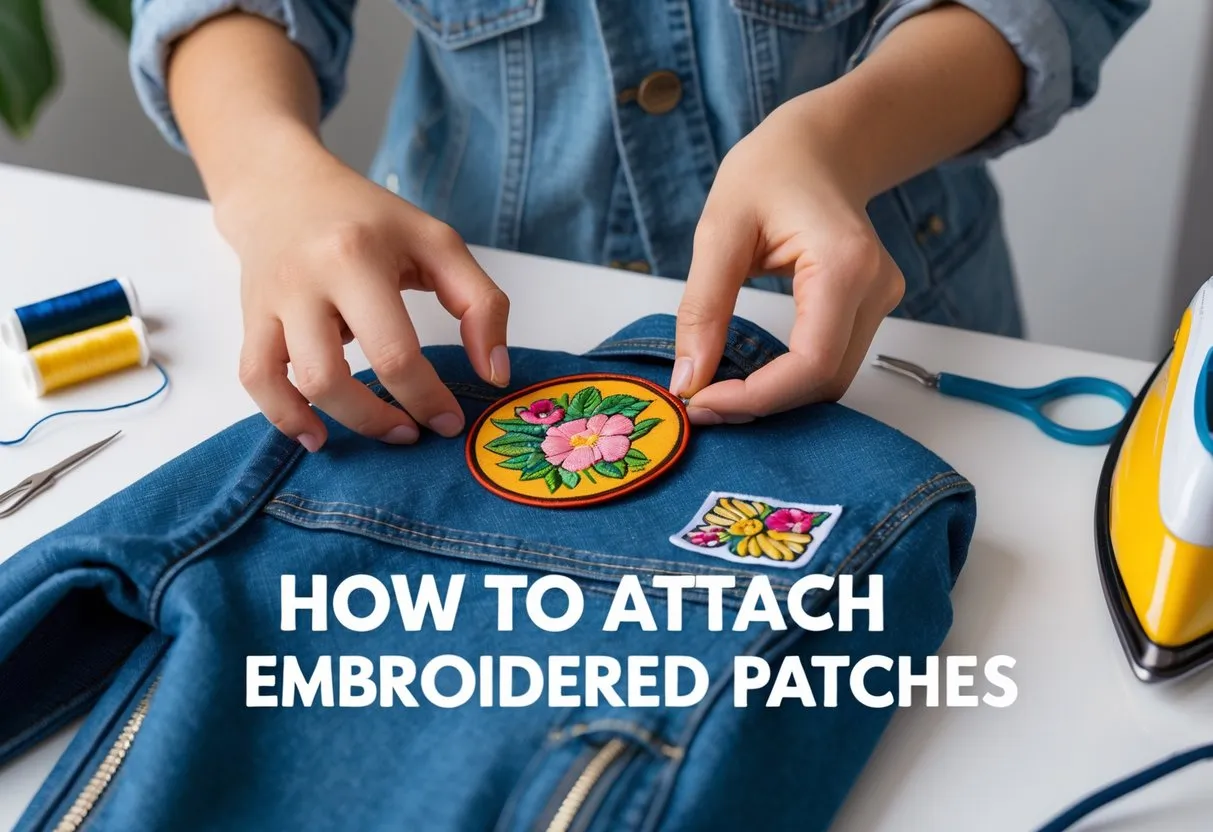
How to Attach Embroidered Patches: Step-by-Step for Clothing
Attaching embroidered patches is a simple way to personalize clothing, bags, or accessories, offering a creative touch that can last for years. The best way to attach a patch depends on the type of fabric, the patch material, and whether a permanent or temporary bond is needed. Common methods include sewing, ironing, and using adhesives, each with its own advantages depending on the project.
Different fabrics require different approaches to keep patches secure and looking good. For sturdy fabrics like denim or cotton, iron-on patches work well by melting the adhesive backing with heat. Sewing offers the strongest hold and is ideal for all fabric types, especially delicate ones. For temporary use, options like Velcro or fabric glue provide flexibility without permanent attachment.
Table of Contents
Choosing the right area on the garment is important too. Patches often stand out best on shoulders, chests, or backs, enhancing the overall design without damaging the fabric. With proper care and technique, embroidered patches can remain vibrant and firmly attached through washing and wear.
Key Takeways
- The attachment method should match the fabric and desired durability.
- Sewing is the most durable way to attach patches.
- Temporary options allow easy swapping and quick fixes.
Choosing the Right Attachment Method
Selecting the best way to attach embroidered patches depends mainly on the fabric type and how long the patch should last. The choice balances ease of application with durability and the specific needs of the garment and patch design.
Assessing Garment and Patch Compatibility
The type of fabric greatly influences the patch attachment method. Thick, sturdy fabrics like denim and cotton tolerate heat well, making iron-on patches a practical choice. These fabrics can handle high temperatures (350°F–400°F), allowing the patch adhesive to bond firmly.
Delicate fabrics such as silk, nylon, or polyester cannot withstand high heat. Applying iron-on patches risks damage like melting or discoloration. For these, hand-sewing or using fabric glue designed for synthetics is safer.
Patch thickness and shape matter too. Flat patches work well with iron-on and glue, but thick or textured patches may need sewing for a secure hold. Curved or hard-to-reach areas, like hats or backpacks, often require hand stitching or creative heat methods to ensure the patch stays flat and secure.
Permanent vs. Temporary Patch Application
Choosing between permanent and temporary attachment depends on how long the patch will be worn.
Permanent methods include sewing and strong fabric glue. Sewing offers the best long-term durability for patches on work uniforms or heavily used clothing. Glue can work too but may weaken after many washes unless reinforced by stitching.
Temporary attachment suits patches meant for short-term use or frequent changes. Velcro and lightweight adhesive tapes let patches be removed or swapped easily without damaging the garment. This is ideal for costumes or seasonal designs.
Iron-on patches sit in the middle. They are quick and convenient but tend to last about 25 wash cycles. Reinforcing iron-ons with stitches can extend their life, providing a balance between convenience and permanence.
Attach Embroidered Patches
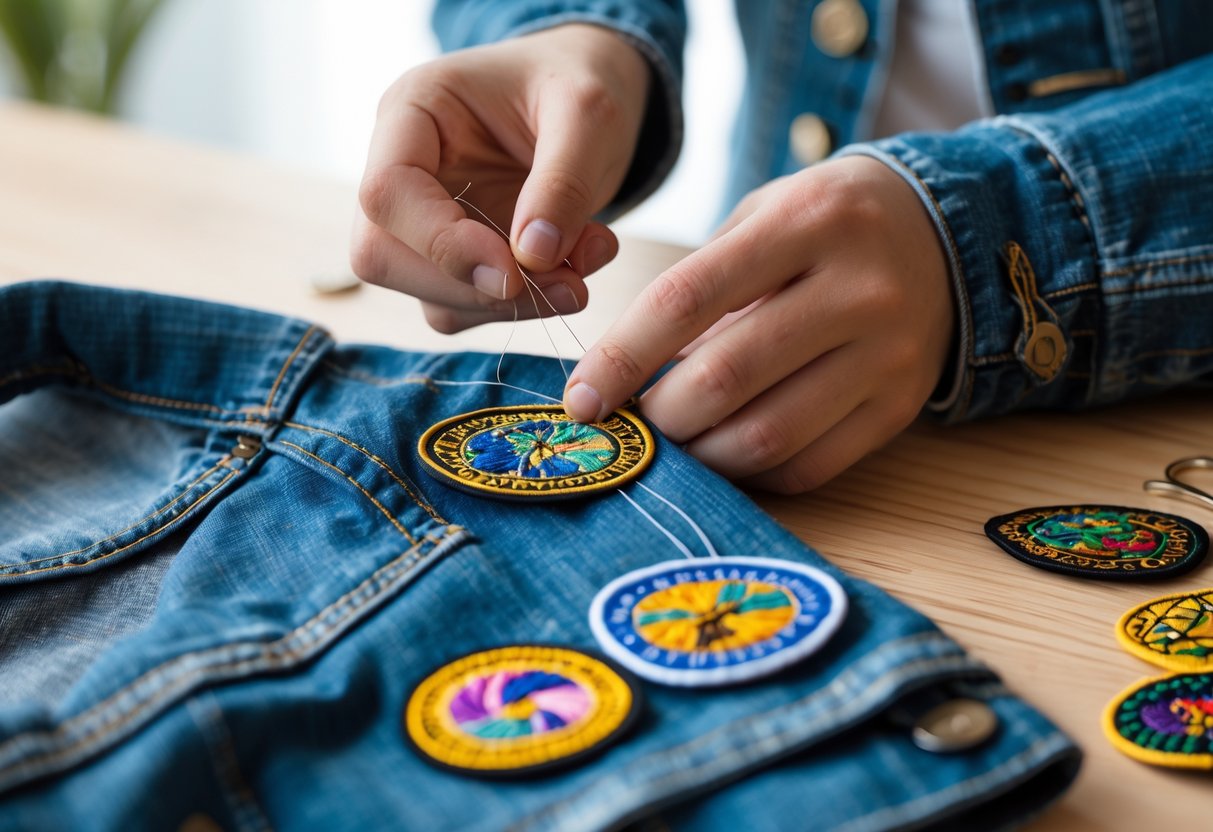
Attaching embroidered patches securely requires careful stitching and the right tools. Whether sewing by hand or machine, knowing how to choose thread and needles affects the patch’s durability and appearance. Clear, even stitches protect the patch from loosening or fraying over time.
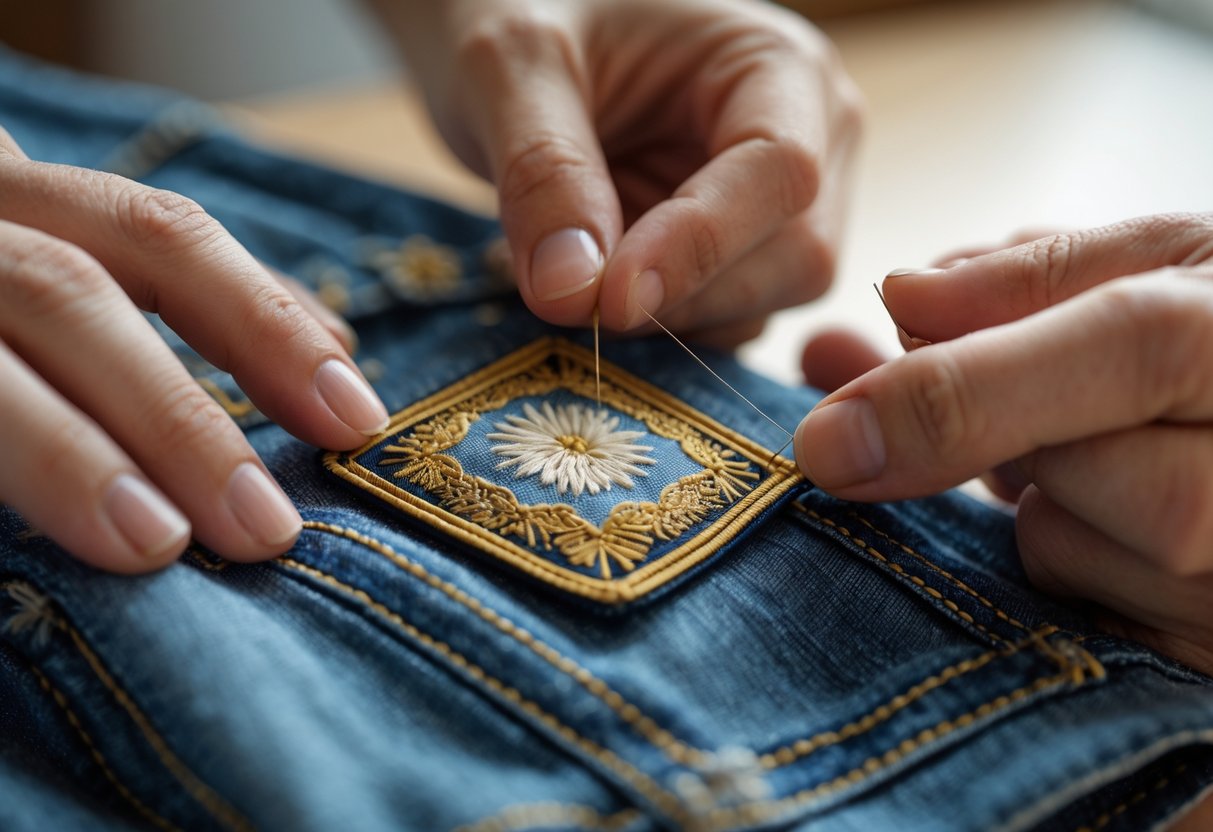
Hand Sewing Technique To Attach Embroidered Patches
Hand sewing is ideal for detailed control and working on tricky spots. Start by placing the patch firmly on the fabric and securing it with pins or fabric tape. Thread a strong needle with matching heavy-duty thread for durability.
Use a whip stitch or running stitch along the patch’s edge. Insert the needle from underneath the fabric and pull the thread through both the patch and fabric. Keep stitches small and evenly spaced, about 1/8 inch apart. This ensures the patch lies flat and stays secure.
At corners or curves, add extra stitches to reinforce weak points. Tie several knots on the fabric’s underside after finishing to keep the thread from unraveling. Trim any loose ends cleanly.
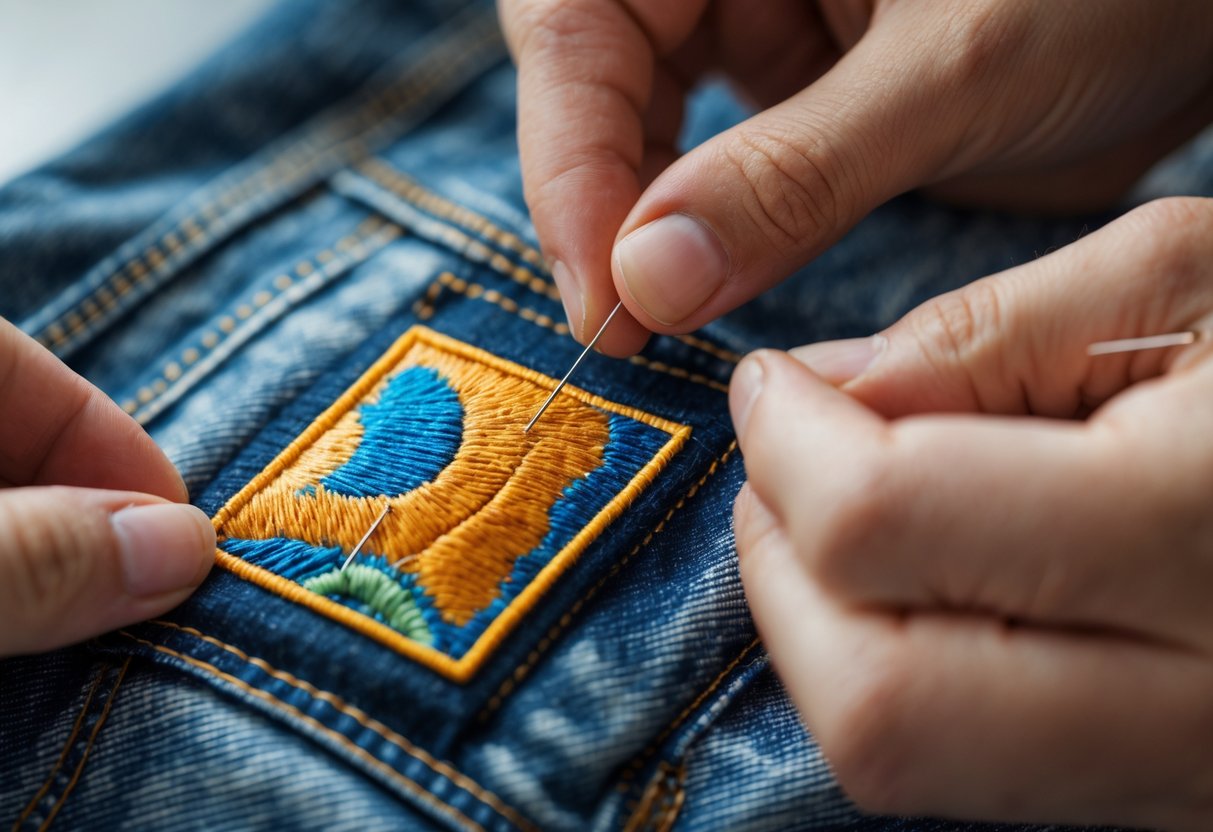
Machine Sewing Instructions To Attach Embroidered Patches
Sewing machines speed up the process and make it easier to get consistent results. Use a zigzag or straight stitch and adjust the stitch width to cover the patch edge fully. A wider zigzag stitch helps prevent fraying.
Before sewing, secure the patch with pins or fusable interfacing to avoid shifting. Set the machine’s tension to avoid puckering on the fabric. Sew slowly along the edge, guiding the fabric evenly with both hands.
Corners require careful handling to avoid bunching. Stop with the needle down, lift the presser foot, pivot the fabric, then continue stitching. This technique helps maintain a clean finish.
Selecting Thread and Needles To Attach Embroidered Patches
Choosing the right thread and needle is crucial for attaching embroidered patches. Use a heavy-duty polyester or cotton thread that matches the patch border or fabric color. Polyester thread tends to be stronger and more resistant to washing.
For hand sewing, select a sharp needle with a large eye to handle thick thread and fabric layers. Sizes 7 to 9 work well for most embroidery patches. For thicker materials like leather or denim, use a heavy-duty or leather needle.
Machine sewing requires a universal or denim needle suited to the fabric type. A size 90/14 needle offers durability without damaging the patch or base fabric. Always test on a scrap piece before sewing on the final garment to adjust needle and thread choices as needed.
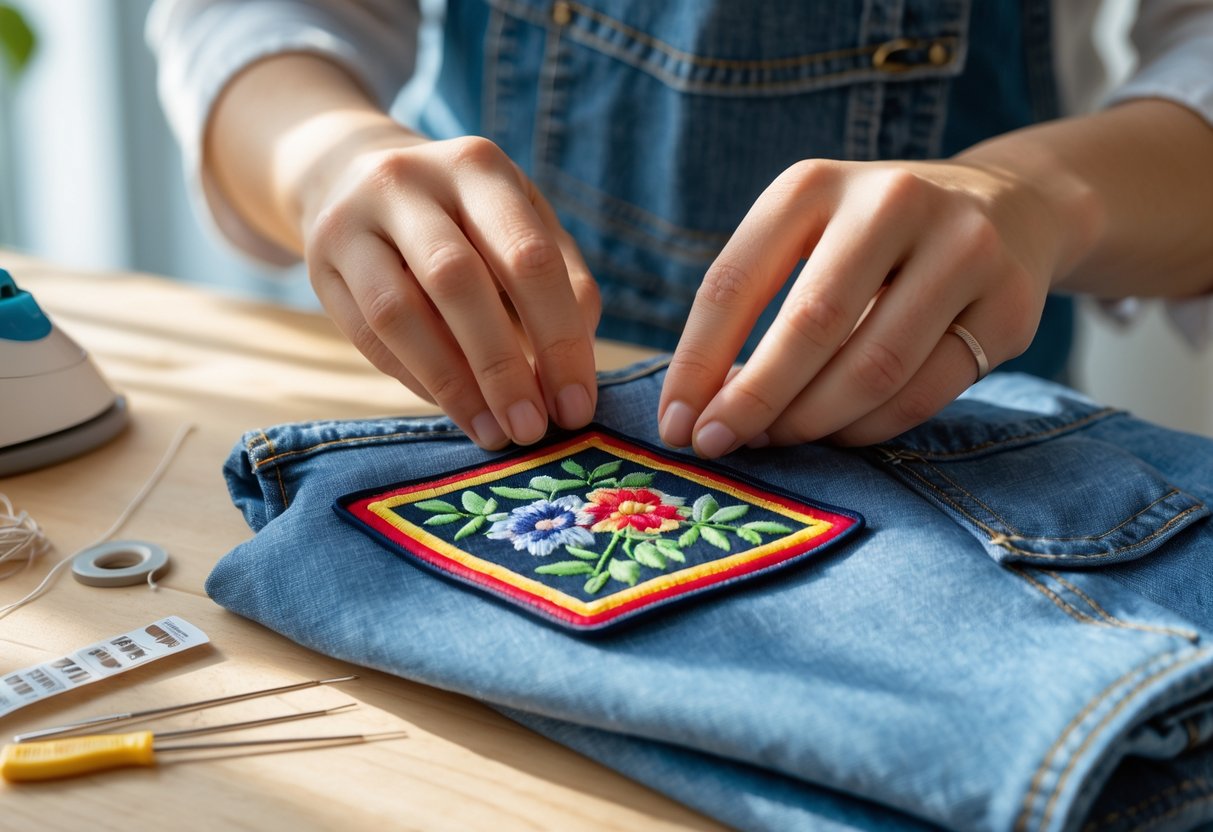
Iron-On Method for Patches
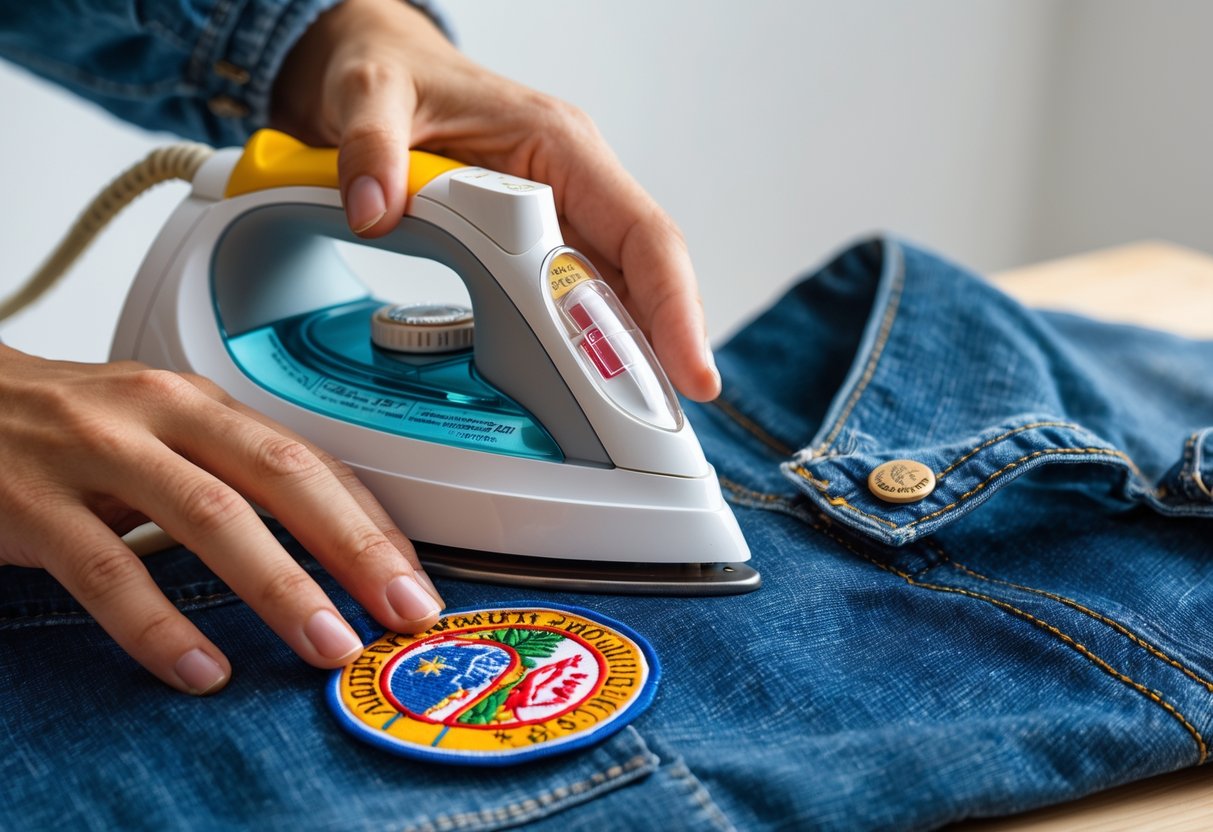
The iron-on method uses heat to melt the adhesive on the back of the patch, bonding it to fabric. This technique requires the right fabric, proper preparation, careful ironing, and good aftercare to keep the patch firmly attached.
Preparing Iron-On Patches and Fabric
First, the patch must have a heat-activated adhesive backing designed for ironing. The fabric should be sturdy and heat-resistant, such as cotton, denim, or canvas. Avoid delicate or stretchy materials like silk, nylon, or spandex, as they may not hold the patch or could be damaged by heat.
Before applying, place the patch on the desired spot and adjust it carefully. Use fabric-safe tape or pins to keep it in place. This prevents shifting when heat is applied. Preparing a flat, heat-resistant surface like an ironing board or a thick towel will make the process safer and easier.
Step-by-Step Ironing Instructions To Attach Embroidered Patches
Set the iron to a medium-high temperature, usually around 350°F (175°C), and turn off steam to avoid moisture weakening the adhesive. Cover the patch with a thin cloth or parchment paper to protect the embroidery from scorching or flattening.
Press the iron firmly on the covered patch for 15 to 30 seconds without moving it. Applying steady pressure helps the adhesive melt evenly. After that, lift the cloth and check the edges. If any part is loose, cover again and press for an extra 10 to 15 seconds. Repeat until the patch is fully secure.
Let the fabric and patch cool completely before touching. This cooling time helps the adhesive bond firmly, reducing the chance of peeling or shifting.
Post-Ironing Care and Longevity
To keep the patch intact, turn the garment inside out when washing. Use cold water and gentle cycles to avoid stressing the adhesive. Strong detergents and bleach should be avoided, as they can break down the glue and fade colors.
Air drying is best. If using a dryer, select the lowest heat setting and remove the item quickly to prevent weakening the bond. Avoid ironing directly over the patch after application; if needed, place a cloth between the iron and patch.
For heavy use or frequent washing, stitching around the edges after ironing can add extra security. Fabric glue can also be applied along the patch edges for additional strength and durability.
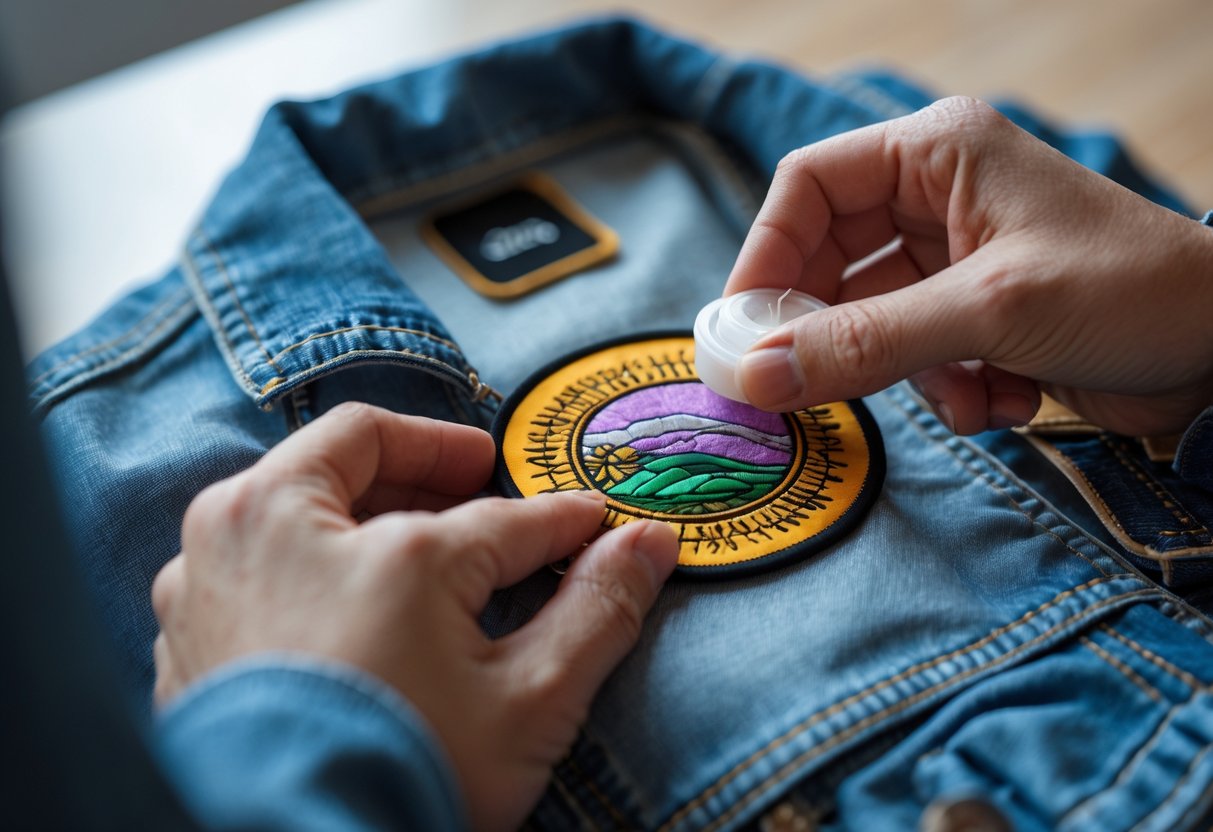
Using Fabric Glue and Adhesive
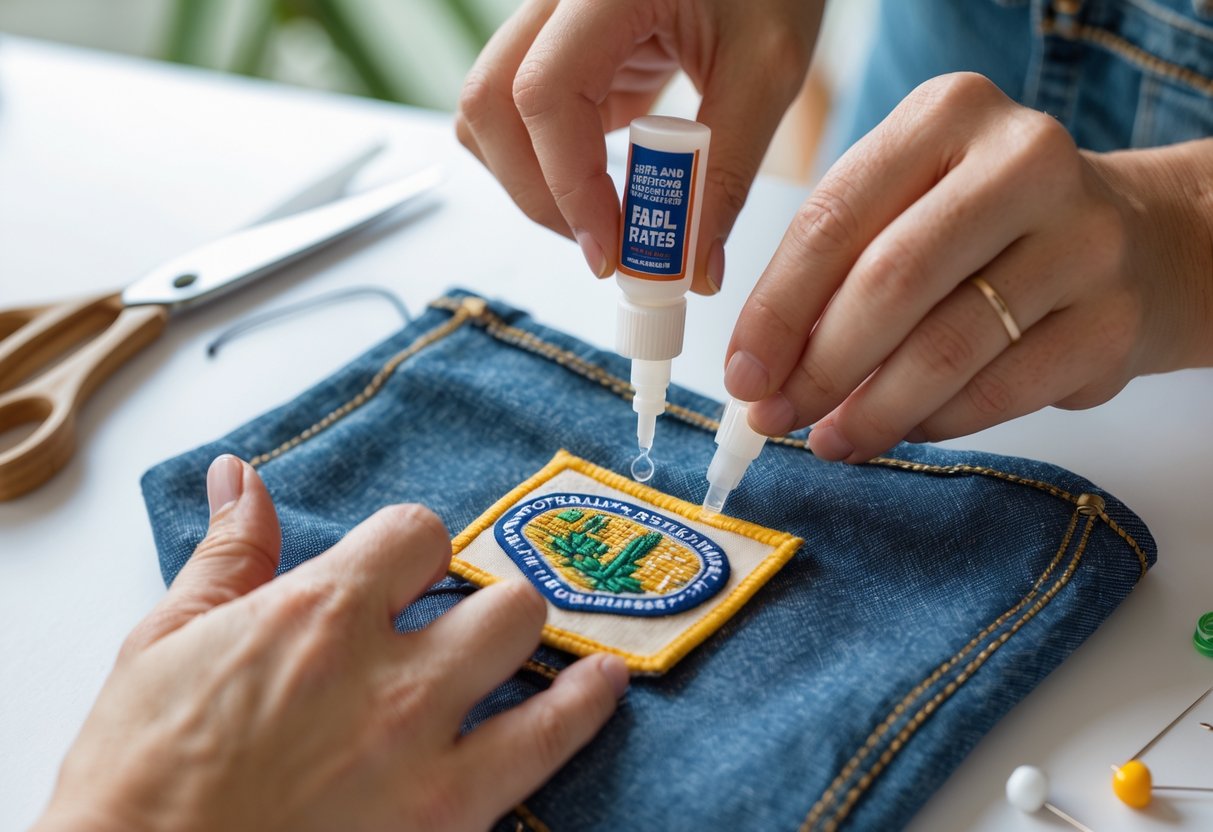
Fabric glue and adhesives provide a strong, flexible bond for embroidered patches. Proper application, careful handling, and allowing enough time for curing are key to ensuring the patch stays secure and looks clean. Attention to surface prep and glue amount helps prevent common problems like seepage or lifting edges.
Applying Fabric Glue
To attach embroidered patches with fabric glue, the first step is cleaning and drying the fabric surface thoroughly. Oils, dirt, or moisture can weaken the bond. Next, apply a thin, even layer of glue to the back of the patch. A small brush, cardboard piece, or gloved finger works well for spreading.
Edges are critical, so trace a fine line of glue around the perimeter of the patch. For larger patches, add a light zigzag pattern in the center to prevent edge lift. Avoid thick layers; they can soak through and damage thin fabrics like cotton. After applying, carefully position the patch on the garment without sliding it around to maintain neatness.
Fabric Adhesive Tips
Choosing the right fabric adhesive means picking one designed specifically for textiles. Good fabric glues dry clear and remain flexible, which prevents cracking or peeling with movement. Some top options include Aleene’s Fabric Fusion for delicate fabrics, Gorilla Fabric Glue for heavy-duty use, and Beacon Fabri-Tac for quick tack and strong edge holding.
Using tools like embroidery hoops helps keep fabric flat and stable during application. This reduces wrinkles and makes spreading adhesive easier. Applying gentle, even pressure with a flat weight after placement improves the bond while the glue sets. Thin, consistent layers limit glue seepage, which can stain or stiffen the fabric.
Curing Time and Best Practices
Once the patch is glued, it usually takes about 24 hours for full curing to reach maximum strength and washability. During this time, the patch should be left undisturbed, preferably under steady pressure. Some adhesives offer quicker tack times but waiting for full cure ensures durability.
If heat is safe for the fabric and glue, pressing the patch lightly with an iron covered by a cloth for 10–15 seconds can speed up setting. Avoid high heat or steam that could weaken the adhesive. After curing, washing should be done gently with cold water to extend the life of the bond.
If any edges lift after curing, reapply a small amount of glue and press again. Proper curing and care ensure a permanent, clean attachment that holds through multiple wash cycles.
Temporary Attachment Solutions
Temporary patch attachment methods offer easy, quick fixes without permanent changes to fabric. These methods help hold patches securely for short periods and allow easy removal or repositioning. They are ideal for costumes, events, or testing patch placement before a permanent bond.
Double-Sided Tape Application
Double-sided tape provides an immediate, no-sew way to attach patches temporarily. It works best on clean, dry fabric surfaces to ensure the tape sticks well. Users should cut the tape slightly smaller than the patch to avoid visible edges.
To apply, peel one side of the tape and stick it to the back of the patch. Then press the patch firmly onto the fabric. This method holds well for a few days but is not durable for long-term use.
Double-sided tape is best for lightweight or smooth fabrics and small patches. It’s easy to remove but may lose adhesive strength with repeated wear or washing. Using fabric-safe tapes helps prevent damage or residue on clothes.
Using Safety Pins for Patches
Safety pins offer a simple and reusable way to attach patches temporarily. They allow quick placement and removal without damaging most fabrics. Pins work well when the patch needs to be moved or adjusted often.
To use safety pins, position the patch on the garment and insert pins near the edges, securing the patch flat. Multiple pins can be used depending on the patch size and fabric thickness.
Safety pins are especially useful for thick or heavy patches where adhesive might struggle to hold. They are less suitable for delicate fabrics where pinholes can leave marks. Though not as neat as other methods, safety pins give flexibility and reliability for short-term attachment.
Placement and Design Considerations
Choosing the right spot for an embroidered patch affects how it looks and lasts. Placement, arrangement, and design all impact the overall style and message of the patch. Careful thought helps the patch stand out clearly and fit well with the garment.
Popular Locations for Patches
Common areas to place patches include the chest, shoulder, upper arm, back, and pockets. The chest area is popular for logos or name patches because it stays visible and flat. Shoulders and upper arms work well for team or rank patches on uniforms.
Back patches create a bold statement, often larger and more detailed, suitable for jackets or backpacks. Pockets and cuffs offer smaller spaces for subtle designs. The type of fabric matters—heavier fabrics like denim and canvas hold patches better, especially with iron-on or sewing methods.
Arranging Multiple Embroidered Patches
When adding several patches, spacing and balance are key. Too close, and patches can look crowded; too far apart, and the design may seem disconnected. Using a grid or asymmetrical layout helps organize patches while keeping the look interesting.
Mixing patch sizes creates contrast. Larger patches can be focal points, with smaller patches around them to complement. Layering patches on different parts of the garment, such as shoulders and chest, prevents overcrowding. Pinning patches before fixing them helps visualize the final layout.
Customizing Patch Designs
Design choices influence how well a patch matches the garment and its purpose. Bold colors and simple shapes make patches easier to see from a distance. Smaller patches should avoid too much detail to keep embroidery clear.
Custom patches allow for personalized logos, symbols, or wording that off-the-shelf options might not offer. Material choice for the patch, like nylon or cotton, affects durability and attachment method. Designs that contrast with the background fabric stand out better and add visual appeal.
Frequently Asked Questions
Proper heat and pressure are key when applying iron-on patches to ensure a strong bond. Sewing requires careful stitching around the patch edges for durability. Some adhesives work better on certain fabrics, offering alternatives to sewing and ironing. Keeping patches secure through washing depends on preparation and reinforcement.
What is the correct way to iron on an embroidered patch?
The fabric should be clean and dry before starting. Preheat the iron to the temperature recommended for the garment, usually medium heat without steam.
Place the patch adhesive side down on the fabric. Cover the patch with a thin cloth or pillowcase to protect it from direct heat.
Press the iron firmly without moving it for 30 to 45 seconds. Let the patch cool before checking if the edges have fully adhered. Reiron if needed on lifting edges.
Can you sew on patches, and if so, how?
Sewing patches is done by placing the patch on the desired spot and marking the edges with a fabric pencil if needed. A needle and thread, matching or contrasting, are used.
Secure the needle inside the fabric to hide knots and sew small, even stitches along the patch edges. Stitch all around, making sure both patch and fabric are pierced.
Finish by tying a knot on the inside of the garment and trimming excess thread. Sewing works on nearly all fabric types and is very durable.
What types of fabric adhesive are suitable for attaching patches?
Fabric glue specifically designed for textiles is recommended. It should remain flexible when dry and wash-resistant for best results.
Some adhesive tapes work but usually offer less durability. Liquid fabric glue with an applicator brush provides better control and stronger hold, especially on delicate fabrics.
Is it possible to attach patches without sewing, and what are the methods?
Yes. Iron-on patches use heat-activated adhesive backing for quick application. Adhesive-backed Velcro allows patches to be removed and replaced easily.
Fabric glue is another no-sew option. It holds well on delicate materials that cannot handle heat or stitching. Applying a thin, even layer of glue and pressing the patch firmly ensures adhesion.
How do you ensure a patch stays on through washing and wear?
Always pre-wash and dry the fabric before attaching the patch to avoid shrinkage. Sewing around the edges, even after ironing or gluing, adds strength.
Avoid using high heat on patches attached with glue or adhesive over time. Regularly check patch edges for lifting and reattach if necessary.
What are the steps to attach a patch to a uniform properly?
Begin by choosing the correct placement based on uniform guidelines. Mark the spot lightly with a fabric pencil.
If sewing, hand stitch with small, even stitches around the entire patch edge. For iron-on patches, apply heat carefully following manufacturer instructions and reinforce with stitches.
Ensure the patch is secure and lies flat. Avoid excess heat or harsh detergents during cleaning to keep patches intact.